WayForPay: Payment Integration in CRM
PRO: FOR INTEGRATORS
The integration is straightforward. However, I’ve provided a detailed setup guide for experienced users and integration partners. The widget is in beta version, please make a note of this development stage in the integration.
How to Connect Payments to Your CRM Account
Step-by-Step Guide:
- Register as a merchant on Wayforpay.
- Add the Wayforpay widget in the CRM marketplace.
- Connect the Wayforpay merchant with CRM.
- Configure invoices, handle advances, and set up discounts.
- Automate processes.
Additional Information:
- How to pay for the integration usage.
- Demo version and the duration of the trial period.
- How to get a discount or subscription bonus.
1. Wayforpay Merchant Registration
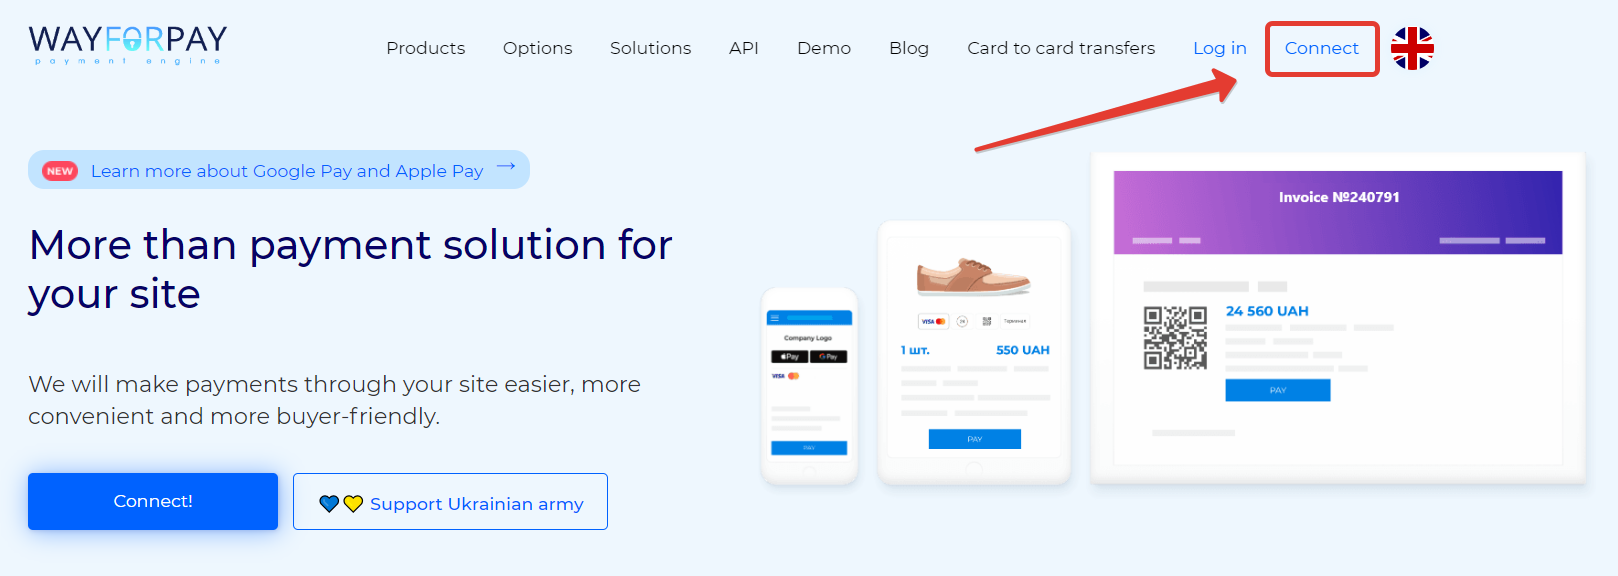
You can complete the registration process independently, taking approximately 1 working day. No need to print documents, send them by mail, or be present in person at any office. Alternatively, you can register with our integrator — message our bot (Decoded Support Bot) for assistance.
Important:
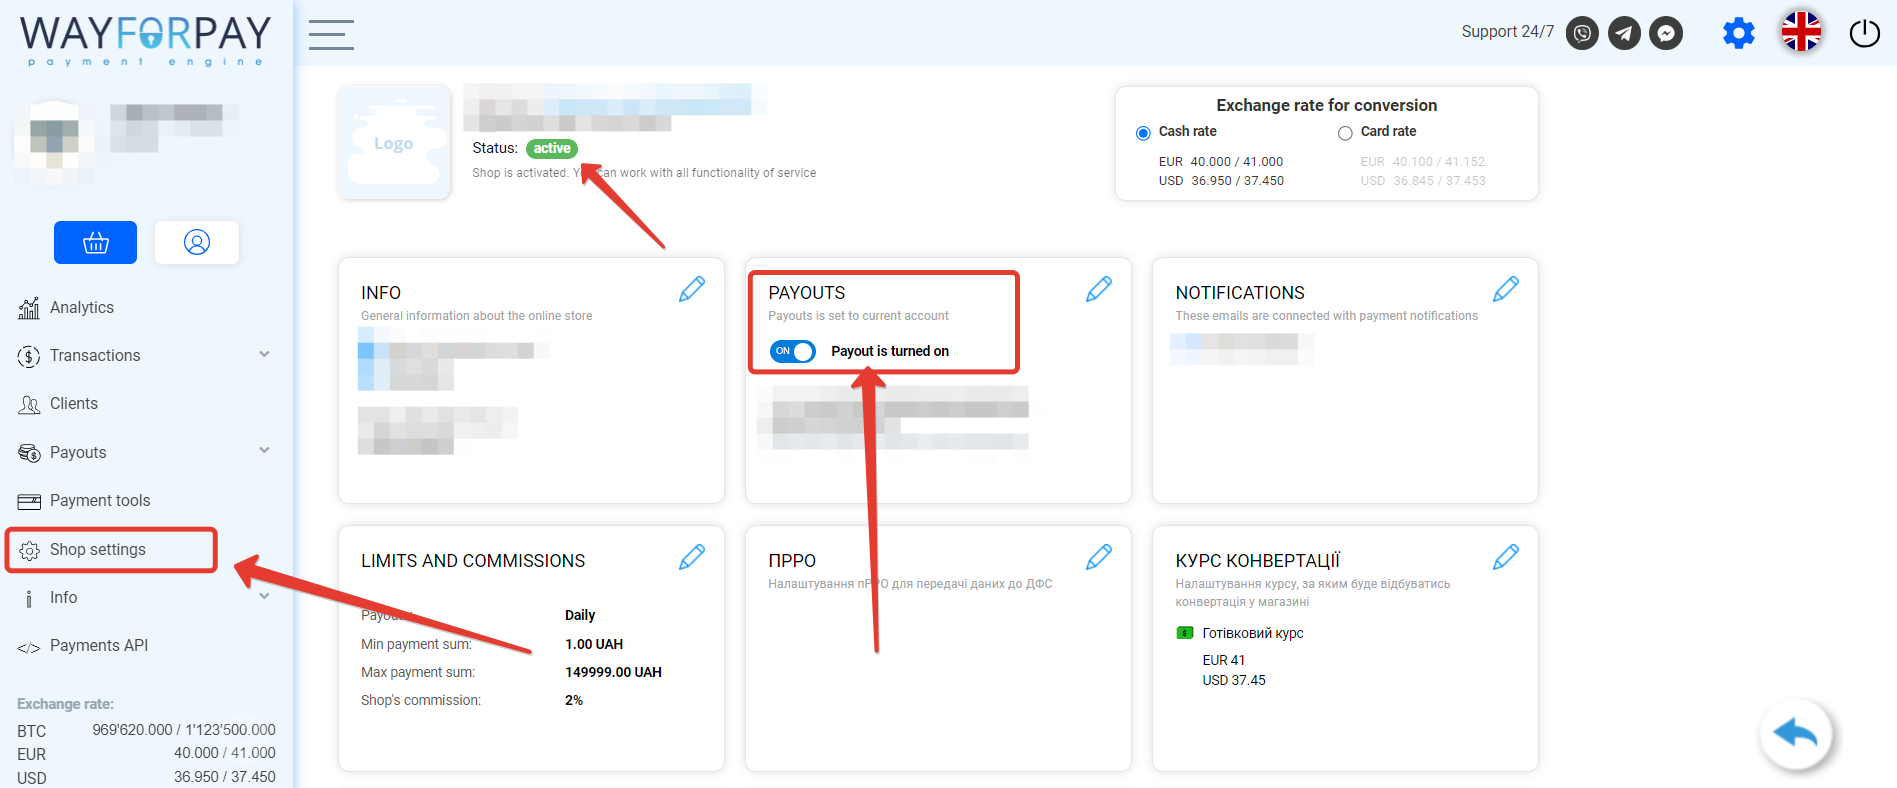
After registration, within your personal account, ensure that reimbursement is enabled — funds are credited to your IBAN account. Recently, Wayforpay no longer provides reimbursement to cards; it’s only processed to a bank account.
Recommendation:
Immediately connect the Wayforpay Telegram bot to receive future notifications and to authorize in the service.
2. Adding the Wayforpay Widget from the CRM Marketplace
Important:
Only a CRM user with administrator privileges can add the integration widget to the CRM account and make settings.
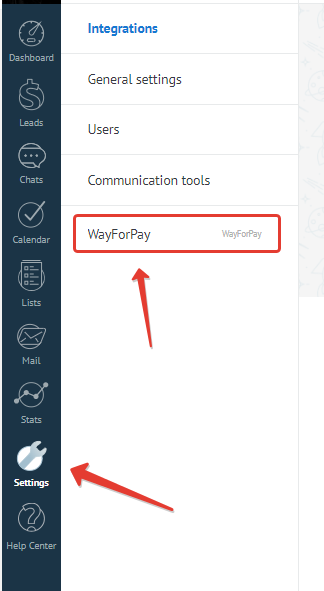
- Go to your CRM account → navigate to «Settings» → «Integrations.»
- In the search bar, enter the query «wayforpay» → click «Install.»
A widget window will appear. Check the box to give consent for the integration widget to process data from your CRM account → click «Install.»
3. Configuring the Wayforpay Widget in CRM Marketplace
You can configure the widget directly in the marketplace in the widget’s pop-up window and in the Wayforpay widget settings tab, which will appear in the general account settings section after installing the widget.
In the Wayforpay personal account, find the merchant’s requisites in the merchant settings. Initially, the data in the window will be displayed as follows.
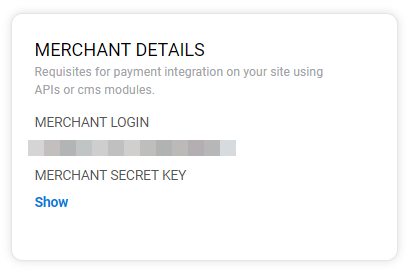
The merchant’s login will be needed for the settings. To copy it, you need to highlight it with the cursor. You can also write it down manually. You are a free person—choose as you like!
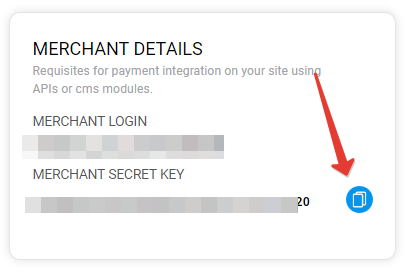
Click the «Show» button to display the secret key.
After clicking the copy button, the key goes to your clipboard. Agree, this is more convenient than selecting and copying. Why they didn’t make a copy button next to the login is unknown to me and history 🙂
Now go back to the widget settings in the CRM account.
By default, the «Default Settings» tab will open first.The logic of widget configuration: from top to bottom and then from left to right across tabs.
Configure the Merchant:
In the «Name» field, enter an arbitrary merchant name to easily identify it within your CRM account.Paste the merchant’s login into the «Login» field and the secret key into the «Secret Key,» respectively.
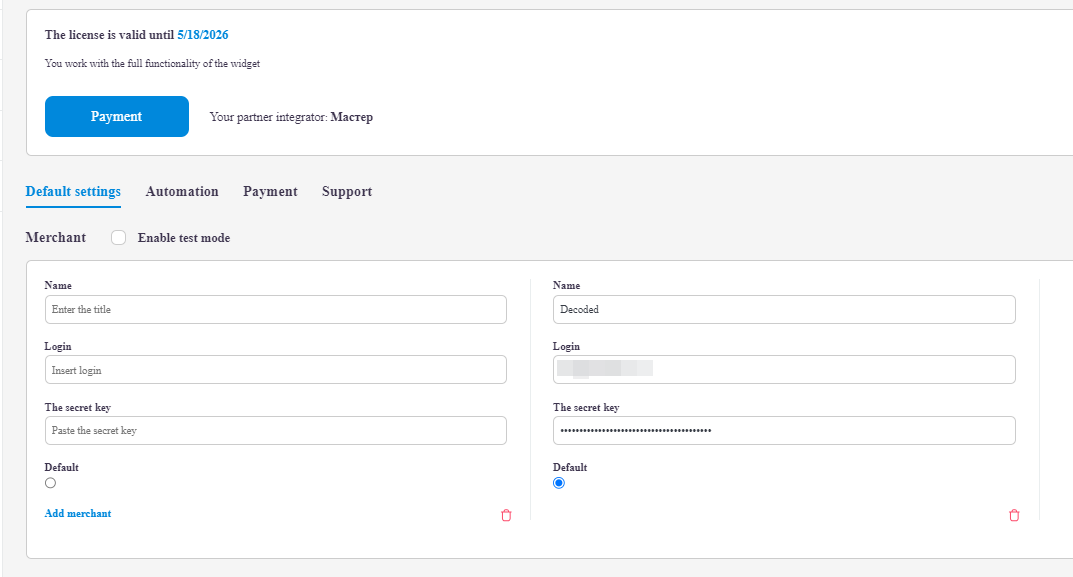
After adding the merchant’s requisites, click the «Add Merchant» button. Merchants will be added as cards from left to right. After adding a merchant, you can set it as the default merchant, so this merchant will be used when creating an invoice in the Lead Card. The number of merchants is unlimited.
Test Mode:
Note that you can enable the test mode for debugging. If you need to perform test transactions with working requisites, use the test card details:
- Test card numbers: 4111 1111 1111 1111 or 5454 5454 5454 5454
- CVV code: any three digits
- Card expiration date: any date (it is important that the date is not earlier than the current one, so that the card has a valid expiration date)
Important:
Payments with this card will always be unsuccessful.
4. Configuring Invoices, Advance Payments, and Discounts
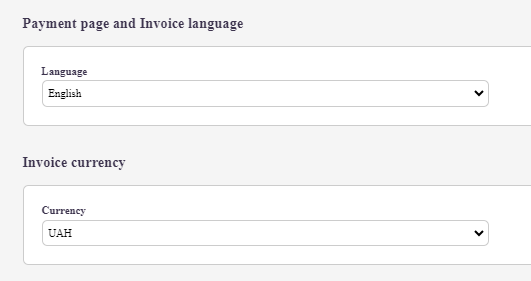
Next, set the default language and currency. The widget does not limit you to using any languages or currencies within your CRM account. The logic of these settings is to set default settings so that, in most cases, managers do not have to change anything in the invoice parameters before creating it.
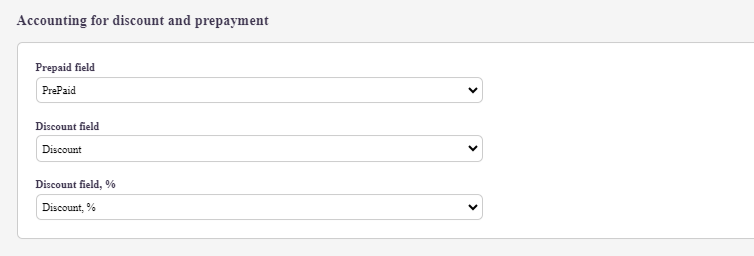
If discounts are involved in your business processes and you also accept advance payments from customers, for the convenience of issuing correct invoices for payment, this section of settings has been created. It is enough to specify which fields in the Lead Card users enter advances and discounts, and the widget will take into account the data from these fields when generating an invoice.
Important:
If you have set all three fields in the settings, and all three fields are filled in any Lead Card, then data from all three fields will be taken into account when issuing an invoice to the payer.
5. Automating Actions
Next, configure automated actions in the «Automation» tab. Track the status of invoices and assign actions in your CRM account based on the status. Our integration is simple yet highly flexible.
My suggestion: set up the transfer of leads based on the invoice status, and in the digital funnel, define trigger actions that you need.
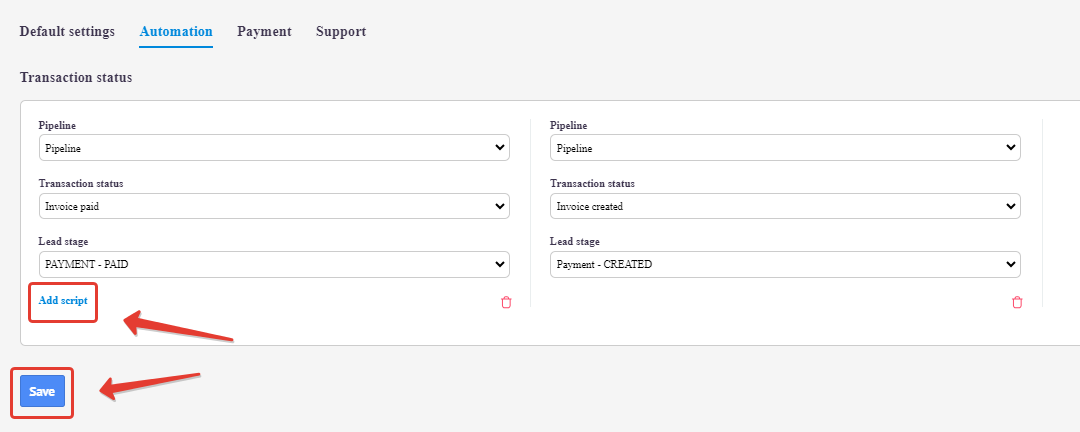
After creating the automation scenario, click the «Add Script» button. The added scenarios will move to the right.
Payment, Trial Period, Bonuses, and Discounts
In the payment settings tab of the widget, you will find the pricing plans for using the integration widget, as well as information about bonuses. While tariffs are straightforward, there are always questions about bonuses. Here are answers to the most common ones:
- The trial period lasts for 30 days, starting from the moment the widget is installed in the CRM account.
- The pricing plan is not tied to the number of users in your CRM account — you pay for the use of integration functionality for the entire CRM account, i.e., for all users.
- After payment, you get access to all integration functionality for all users.
- You will receive a bonus to your tariff for recommending our widget to your contacts. Ask your friend to install our integration in their CRM account, let us know their ID, and after your friend pays the tariff, both you and your friend will receive a bonus to the tariff. Mutual benefit!
- If you use the paid integration service of the widget through our integrator or through our partner, you will receive a bonus to the tariff plan upon completion of the work.
- We reward users for fresh ideas and participation in the development of integration: share ideas for new features, sales ideas, distribute the widget among other users; express your thoughts on the performance of features, share expectations and disappointments. In return, we provide additional days to the tariff or pay cash rewards.
Please note that throughout the widget interface, the partner through whom you are working is mentioned. This implies that regarding payments and support, you can directly contact the partner, as they are better immersed in the settings of your account and business processes. However, this does not mean that you are «tied» to this partner. If you decide to change the partner, we will inquire about the reason and, of course, support your decision.
Decided to become our partner? Write to the support bot — let’s discuss cooperation!
Support:
In the support section, you will find a button to go to the Telegram support bot and links to materials on setting up the widget.